Introduction
The Silo Certificates window can be used to add, edit, verify and delete Silo Spot Certificates. The window is also used to select a certificate when entering a silo spot ask/sell.
In order to facilitate batch creation of Silo Certificates, Swordfish also supports the import of Silo Certificates from an Excel sheet.
Method
| 1. | Ensure that you are logged in to the Safex Agricultural exchange, ensure  is your Swordfish selected exchange and ensure you have trading rights on this exchange. If unsure about your trading rights then contact your broker to verify your rights. is your Swordfish selected exchange and ensure you have trading rights on this exchange. If unsure about your trading rights then contact your broker to verify your rights. |
| 2. | Select View > Silo Spot Basis > Silo Certificates |
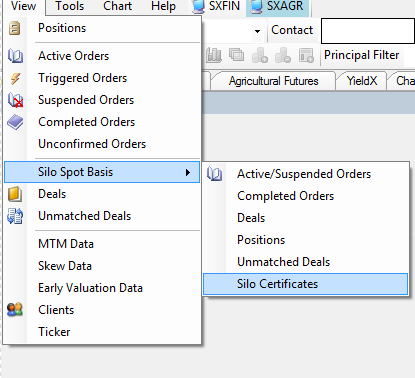
| 3. | See the Silo Certificates window appear. |
| 4. | Click the Add menu option as shown in the image below. |

| 5. | The following window appears: |
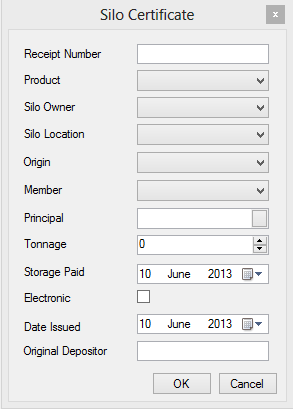
| 6. | Enter the required information in the fields and click the OK button. |
| 7. | Proceed with the Verification process.
|
Note
On the successful capture of a certificate, it will have an initial status of “Not Verified”. The certificate details must then be double checked, and if all details are correct the certificate can be submitted to the Exchange for verification using the Verify button. If verification is successful the certificate status will be changed to “Verified”.
The Exchange is responsible for the process that updates a certificate status of “Verified” to “Ready for Delivery”. Only certificates of status “Ready for Delivery” will be available for trading and these certificates may no longer be edited or deleted.
|
|
| 1. | A template for Silo Certificate creation can be found in your Estuary folder : Documents\Estuary\Data\Excel\SiloCertificatesUpload.xls |
| 2. | Prepare the Excel sheet for importing by filling out the relevant information. |
| 3. | Once the Excel sheet is ready, open the Silo Certificate window by selecting View > Silo spot basis > Silo Certificates from the menu bar at the top of Swordfish. |
| 4. | Click the Import menu item on the Silo Certificates window for the Silo Certificate Excel spreadsheet to appear as illustrated below. |

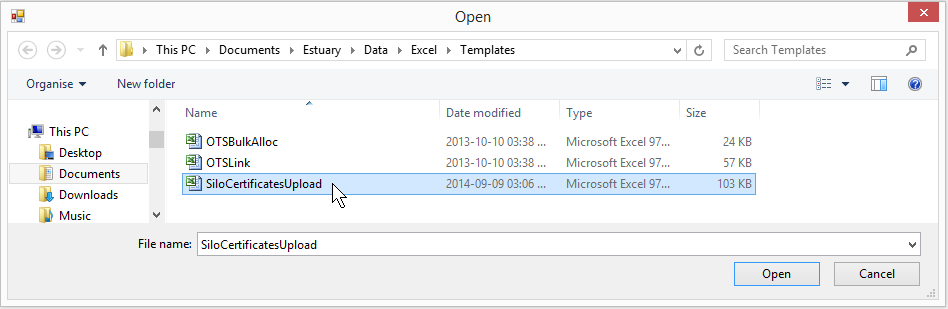
| 5. | Click on the Open button. Check the Messages tab or Event Log for possible error during the data validation. |
| 6. | View the proposed Silo Certificates in the Silo Certificate Batch Import dialog window. |
| 7. | Verify that the proposed certificate details are correct and click on Submit. |
| 8. | View the Silo Certificates window and verify that all submitted certificates are in fact present in the Silo Certificates window. If the results are not what you expected then view the Messages tab or Event Log for possible errors. |
|
©Estuary Solutions (www.estuarysolutions.com), All rights reserved


